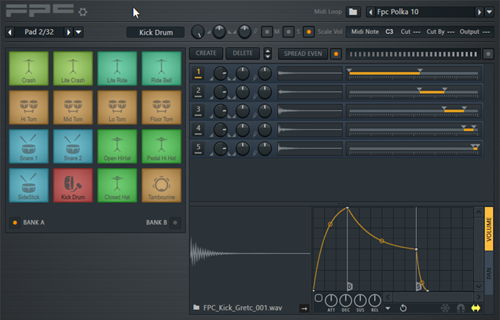
Auditioning and using MIDI loops in FL Studio is fairly easy. In this post I'm going to show you how. First, I'll audition MIDI files in FL Studio and add them to a project as 'patterns'. Then I'll demonstrate how to construct a basic drum track using the patterns.
Drum sounds: I'll be using the FPC drum module for this tutorial.
Why FPC? Because it has quite a few kits and because the kits are mapped consistently - for the most part. And because you can use it to easily audition files (See video 4 below).
Note: we include files mapped for FPC in all of our commercial products.
Tip: For our list of recommended kits and our FPC MIDI mapping scheme, please see the resources section near the end of this post.
Overview
Here are the three basic steps when creating a drum track in FL Studio:
1. Add FPC to your project and select a kit
2. Audition and add patterns to your project
3. Construct your track using the patterns
Auditioning MIDI: you can audition MIDI from within FPC or the Browser window. Please see videos #3 and #4 below for demonstrations of each method.
OK, let's get started!
Add FPC to your project and select a kit
First, you need to add drum sounds to your project. Then select a kit.
The video below shows how to add FPC to FL Studio and how to load a drum kit.
Now you can start auditioning MIDI files and adding patterns to your project.
Opening the Browser Window
In the video below, I open the FL Studio Browser Window. The Browser allows you to audition files stored anywhere on your system.
Note the location I'm browsing in: Scores > FPC drumloops. You'll find all of the FPC loops stored here. You can also store 3rd party loops or your own files here.
Audition and Add Patterns with the Browser
The video below demonstrates how to audition and add MIDI patterns to FL Studio using the Browser window.
This can be the most difficult part to understand.
IMPORTANT: As soon as you find a pattern you like, rename it and optionally, add a color. Then add another pattern slot BEFORE doing anything else.
Audition and Add Patterns Directly from PFC
The video below shows how to audition and add patterns from within FPC.
Now that you know how to audition MIDI files and collect patterns, it's time to build a drum track for your project!
The video below demonstrates how arrange your patterns into a drum track in FL Studio.
In this video, I'm using the FPC files from our Breakbeats pack.
Summary
Auditioning and working with MIDI in FL Studio is fairly easy. However, it's not exactly intuitive. It took about an hour for me to work out a reasonable work flow.
The most confusing part for me was understanding how to work with the built-in 'pattern' functionality. By that I mean storing and naming each MIDI file I planned to use.
Another issue is that the FPC kits are not all mapped the same. And while the kit mappings are usually close to the general MIDI standard, some are way off.
Due to these limitations, I've prepared a couple of helpful documents and posted them below.
Additional Resources
1. FPC Kit Guide
Here's a list of recommended kits along with some notes on the issues found with the other kits:
Download the Groove Monkee FPC Kit Guide
For those kits I cannot recommend, I list what's missing by instrument type (cymbals, toms, etc.).
For example, some kits don't have a floor tom or a ride bell. If you're programming your own grooves this might not be an issue. But if you're working with commercial MIDI loops, you need to be aware of these short comings.
2. Groove Monkee FPC Mapping
I've also prepared a PDF file which shows you we've mapped our FPC MIDI files.
Download the Groove Monkee FPC MIDI Mapping
These guides are designed to help you understand the issues with some of the FPC kits. If necessary, you can rearrange existing kits or create your own so they'll match our files exactly.
If you have questions about this post or about our products, feel free to contact us.
Thanks for reading and good luck!


