Note: this information works for Studio One versions 3 and up.
In this post, we provide an overview of Studio One pitchlists, explain how to install them and how to load them. We even have a free collection of pitchlists for the most popular drum instruments such as Addictive Drums, EZdrummer, Steven Slate, Superior Drummer and more.
Free Pitchlist Collection
Download our pitchlist collection HERE
What is a Pitchlist?
A 'pitchlist' file is an editing tool that shows you what drum sounds are mapped to which keys in Studio One. These are also known as 'pitch names'.
If you've purchased drum loops from us you'll find Studio One pitchlist files inside: "Extras\Studio One\Pitch Names".
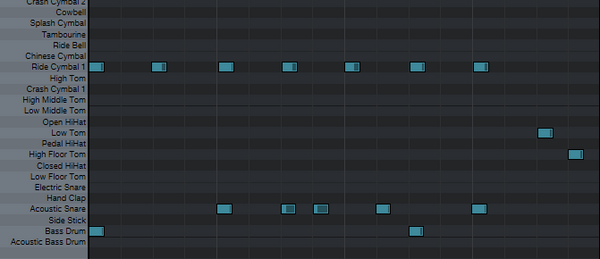
The pitchlist files are for 3rd party plugins such as Addictive Drums, EZdrummer, Steven Slate, etc. Here's an example of a pitchlist file in action:
On the left side you can see the names of the drums such as Bass Drum, Side Stick, etc. Pitchlists make it much easier to edit and program MIDI drum sequences. Looking at the sequence, you can see that it uses the ride and exactly where to move those notes to use the hi-hat instead.
How to Install Pitchlist Files
1. Find the pitchlist files in your download
You'll find the pitchlist files in the 'Extras' folder inside your download: "Extras\Studio One\Pitch Names".
2. Find your Studio One pitchlist folder
PC
Open the installation folder of Studio One. The default location is
C: → Program Files → Presonus → Studio One 5. From there go to Presets → User Presets → Pitch Names.
Mac
Right click on the Studio One app icon and select Show Package Contents. Navigate to Contents → presets → User Presets → Pitch Names.
3. Copy the files into your Studio One pitchlist folder
Copy our pitchlist files into your Pitch Names folder. Note: you don't have to use all of them. Feel free to copy just the ones you plan to use.
4. Re-index your Studio One Presets
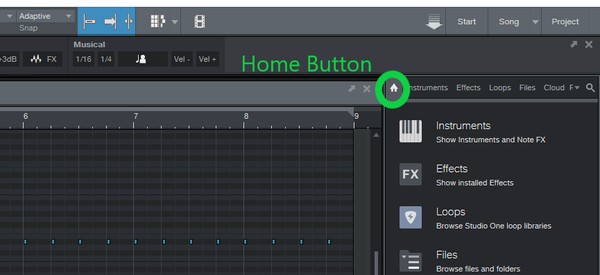
Before you can use the new files, you have to re-index your presets. Open Studio One and click on the home icon on top of the right section as shown in the image below:
Click the button named Re-Index Presets, which appears at the bottom of the section as shown in the image below:
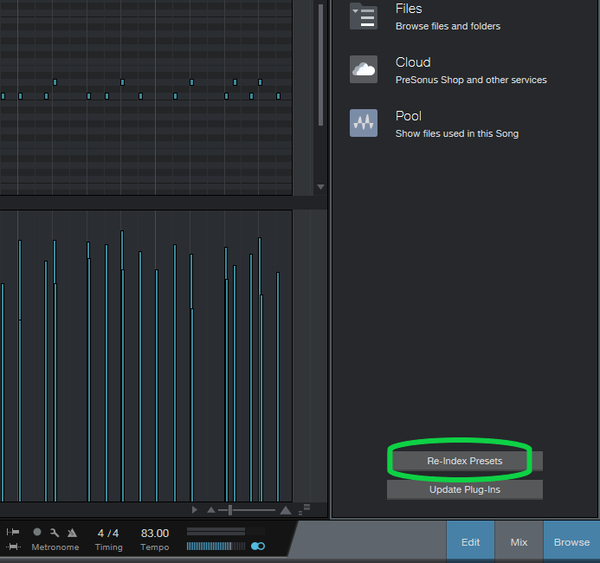
The new files will be available in the Studio One Editor view.
5. Loading a pitchlist file
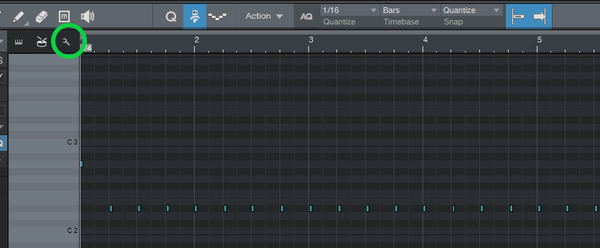
Open the Studio One Editor view by pressing F2 (View → Editor) or clicking on your MIDI sequence. Click on the Drum icon as shown in the image below:
Next, click on the wrench icon (settings) as shown in the image below:
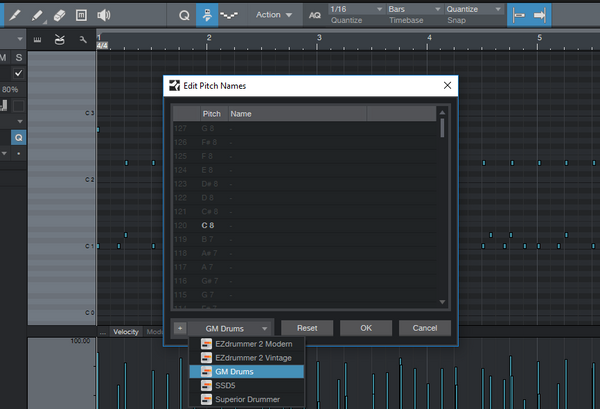
The Edit Pitch Names window will open. The available pitchlist files will appear in the drop down menu at the bottom. Select the file you want and click OK. Please see the image below:
That's all there is to it. You can now clearly see how the drums are mapped when using your favorite drum plugins. If we don't have a pitchlist for your favorite plugin, please send a request to support and we'll try to make one for you.
If you have any questions about this installation or our products, please contact us.
Thanks for reading and Rock On!

